Producing the Board
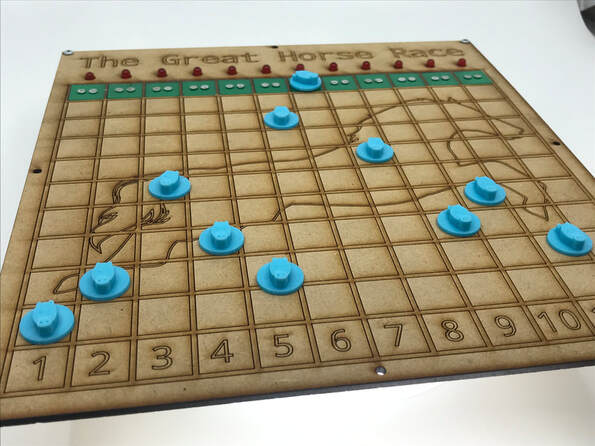
The two main pieces of any board game are the board itself, and the other game pieces that you need to move around the board. In this section we will have a look at designing the game board. As per the requirements, the board needs to be an original design and designed on Tinkercad. The board will be manufactured using the laser cutter and all the decorations on the board need to be created using the laser. Using the CAD software you can customise the board in any number of ways and ensuring that the board reflects the theme of your game is important in ensuring the board is the centre piece of your game.
With the laser cutter you have three different types of action that you can use on the board
The file I used to create these game board is below as is a link to the example of a build journal, something you will need to keep as you progress through the build.
With the laser cutter you have three different types of action that you can use on the board
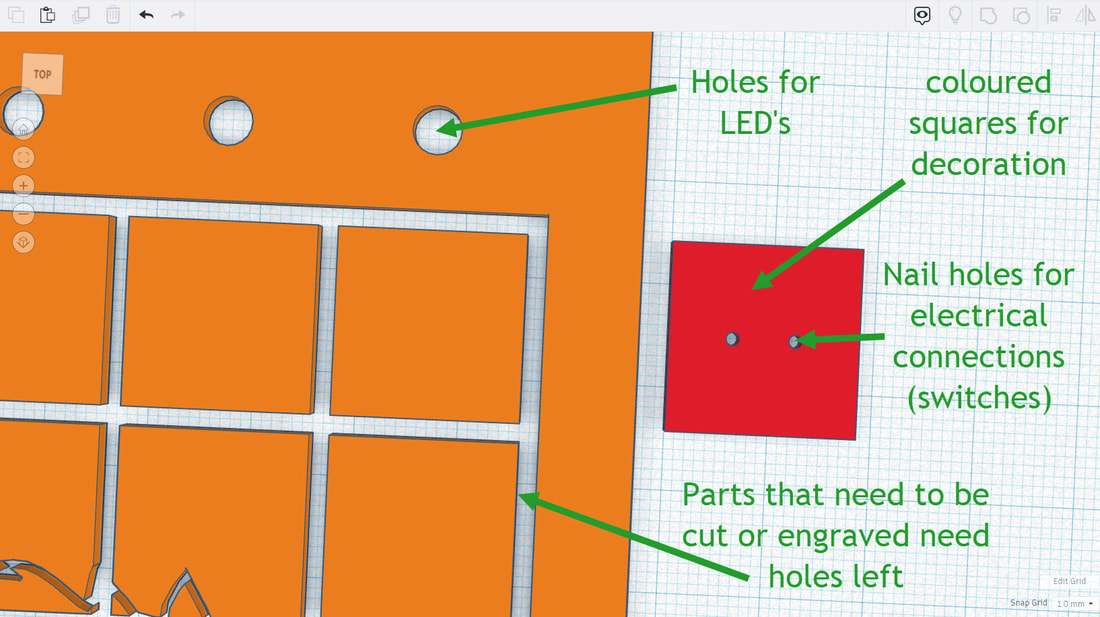
- you can cut it as can be seen by the external perimeter of the board, the green squares and the holes for nails and the LED's. This action goes all the way through the material you are using.
- you can vector engrave, which is the engraving of thin lines on the surface, this is the type of engraving shown by the squares, numbers, title and horse image. This acts in the same way as a cut but just doesn't go all the way through.
- you can raster engrave which is the equivalent of colouring something in by shading, this cuts out a thin later of material over the area, this is a very slow process. There is none of this engraving on the board game above
The file I used to create these game board is below as is a link to the example of a build journal, something you will need to keep as you progress through the build.
|
Using Tinkercad to design items for laser cutting is a bit trickier than designing it for 3D printing, However if you understand that in order to use the cutter you are trying to make lines, and therefore need to make edges, then this helps. We create edges by leaving small gaps in your board, these are the features will be that can be cut or engraved.
Most of the work around what will be cut, what will be raster engraved and what will be vector engraved will be done outside of Tinkercad.3 |
|
|
If your group is looking at including any electrical components into your design then there are some more considerations you will need to make to incorporate those items. This includes holes for the nails to create electrical switches, LED's motors etc.
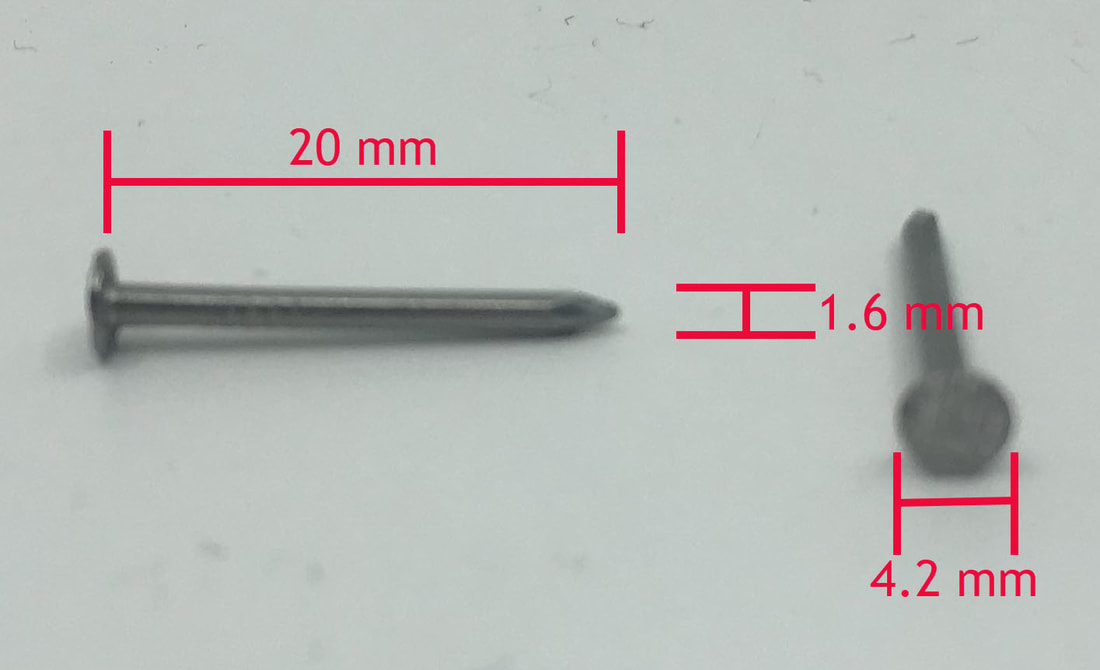
There are lots of different components you may use and therefore it is not feasible to list all of the measurements for them here, but to give you an indication of some of the measurements you may need for your items I have included ones for the nail here. |
|
